- Available 24/7 — 365 Days a Year
- Toronto & All GTA — Southern Ontario
- IICRC Certified · Insurance Approved
- Residential & Commercial Services

CALL NOW
(416) 657-2222

(416) 657-2222
How to Prevent Mould After Bathroom Remediation?
Black mould, scientifically known as Stachybotrys chartarum, thrives in humid or water-damaged environments such as basements, bathrooms, and behind walls. Once it grows, it releases toxic spores that spread through the air and cause serious health issues,
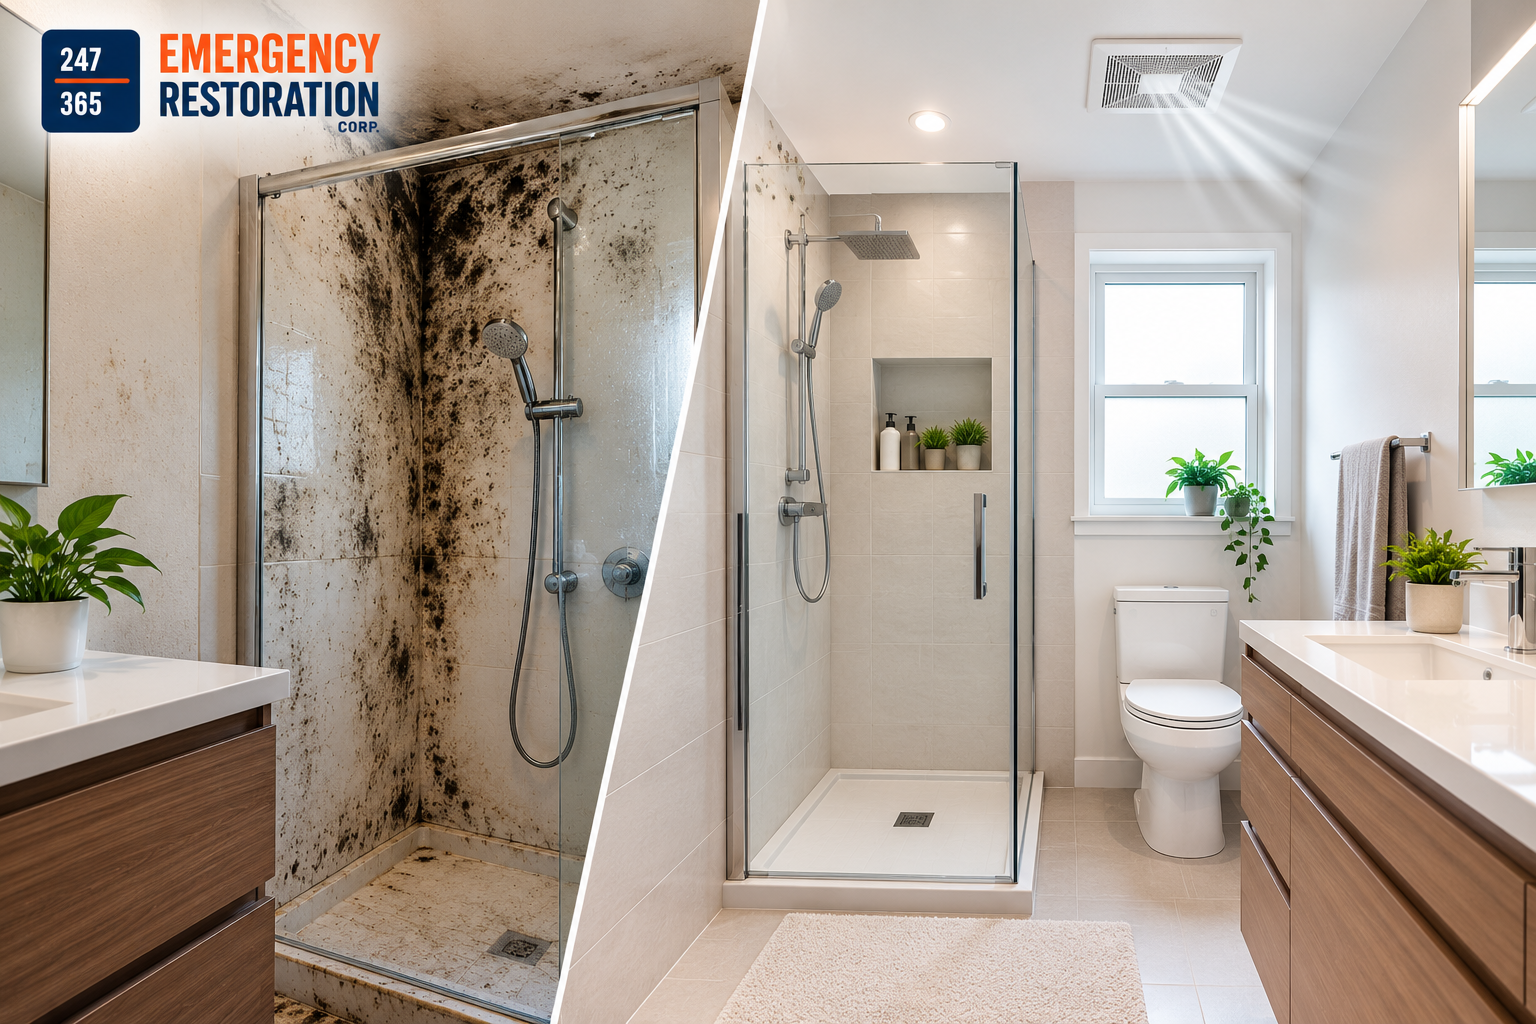
Bathroom mould can be a persistent problem, especially in areas exposed to frequent moisture, warm temperatures, and limited ventilation. Even after professional mould remediation, mould may return if the underlying moisture issue is not properly addressed. Bathrooms contain several conditions that encourage mould growth, including steam from showers, condensation on windows, plumbing leaks, and damp surfaces.
Preventing mould after bathroom remediation requires more than cleaning visible stains. Homeowners need to control humidity, improve ventilation, repair leaks, maintain bathroom surfaces, and monitor areas where moisture can accumulate. Taking these steps helps protect the bathroom, preserve building materials, and maintain healthier indoor air quality.
In this guide, we explain practical ways to prevent mould from returning after bathroom remediation and how to recognize early warning signs before the problem becomes more extensive.
Understand What Caused the Mould
Keep Bathroom Humidity Under Control
Improve Bathroom Ventilation
Repair Plumbing Leaks Immediately
Keep Bathroom Surfaces Dry
Maintain Grout, Caulking, and Seals
Choose Moisture-Resistant Materials
Monitor Hidden Areas for Moisture
Establish a Regular Cleaning Routine
Recognize Signs of Recurring Mould
Know When to Contact Professionals
Frequently Asked Questions
The first step in preventing mould after bathroom remediation is identifying and correcting the original source of moisture. Mould can develop when water remains on surfaces or becomes trapped behind walls, beneath flooring, or around plumbing fixtures.
Common causes include leaking pipes, damaged shower seals, poor ventilation, roof leaks, condensation, and water entering through damaged grout. If remediation removes the visible mould without addressing these conditions, the problem may return.
After remediation, confirm that affected materials have been appropriately cleaned or removed, the moisture source has been corrected, and damp materials have been adequately dried. Professional assessment may be necessary when water has penetrated concealed building materials.
High humidity creates favourable conditions for mould growth. Bathrooms can become particularly humid during showers and baths, especially in smaller rooms with limited airflow.
Use a bathroom exhaust fan during every shower and continue running it afterward, following the fan manufacturer’s guidance. Opening a window can also help when outdoor conditions allow, but it should not replace adequate mechanical ventilation when ventilation is needed.
A hygrometer can help you monitor indoor humidity. A useful general target is approximately 30% to 50% relative humidity, while keeping levels below 60% whenever possible. The ideal level may vary with climate and building conditions.
If humidity remains high despite normal ventilation, consider whether the exhaust fan is undersized, blocked, or malfunctioning.
Effective ventilation removes moisture before it settles on walls, ceilings, mirrors, and other surfaces. Without sufficient airflow, dampness may persist long after a shower has ended.
Check that the exhaust fan operates correctly and moves air outdoors through a suitable duct rather than into an attic or another enclosed space. Clean the fan grille regularly and arrange professional inspection if airflow appears weak.
Keep bathroom doors or windows positioned to support airflow when practical and safe. If the room has no effective exhaust system, consider having a qualified contractor assess ventilation options.
Good ventilation is especially important after remediation because it helps reduce the chance of moisture accumulating on newly repaired or replaced materials.
Small plumbing leaks can create substantial moisture problems over time. Water may escape beneath sinks, around toilets, behind shower walls, or from connections that are difficult to see.
Inspect visible pipes, taps, shower fittings, toilet connections, and the cabinet beneath the bathroom sink. Look for dripping water, damp surfaces, swollen cabinetry, peeling paint, or unexplained musty odours.
Repair leaks promptly rather than relying on towels, sealants, or temporary solutions that do not correct the source. If water has entered a wall or floor, a professional assessment can help determine whether concealed materials need drying or repair.
Regular plumbing checks can prevent minor defects from becoming major mould problems.
Standing water and persistent dampness can encourage mould on grout, silicone, window frames, and other surfaces.
After showering, use a squeegee to remove water from glass doors and tiled walls. Wipe down wet countertops and remove water that collects around taps and sinks. Hang towels and bath mats where they can dry completely rather than leaving them folded or bunched up on damp surfaces.
Keep shampoo bottles and other bathroom products from trapping water against walls or shelves. Periodically inspect corners, shower niches, and areas around fixtures where water tends to collect.
These small habits help reduce the amount of time surfaces remain wet.
Grout and caulking protect joints around showers, bathtubs, sinks, and other fixtures. Over time, they may crack, shrink, separate, or deteriorate, allowing water to reach materials behind the finished surface.
Inspect these areas regularly for gaps, loose grout, damaged silicone, or persistent discolouration. Replace failed caulking with a suitable bathroom product after properly preparing and drying the area. Follow manufacturer instructions for application and curing.
Remember that new caulking should not be applied over active mould or damp materials as a substitute for remediation. If mould repeatedly appears around a joint, investigate whether water is entering behind it.
When repairing or renovating a bathroom after mould remediation, appropriate material selection can support long-term moisture management.
Consider bathroom-rated paint, suitable tile systems, moisture-resistant building materials, and high-quality sealants designed for wet environments. Materials should be installed according to manufacturer instructions and local building requirements.
Moisture-resistant does not mean waterproof or mould-proof. Even durable materials can develop mould when dust, organic residues, and persistent moisture are present.
Pay particular attention to areas surrounding showers, bathtubs, sinks, and floors where water exposure is frequent. Proper installation and waterproofing are just as important as the materials themselves.
Some of the most serious moisture problems develop where homeowners cannot easily see them. Leaking pipes, failed shower waterproofing, and water trapped beneath flooring can allow mould to develop behind finished surfaces.
Watch for warning signs such as bubbling paint, warped baseboards, soft drywall, loose tiles, recurring stains, or a musty smell that persists despite cleaning.
Do not ignore these signs simply because visible surfaces look clean. Moisture meters and other inspection tools can help qualified professionals investigate suspected dampness without immediately removing large sections of finished material.
Early investigation can reduce repair costs and help prevent damage from spreading.
Routine cleaning removes soap residue, body oils, dust, and other deposits that can support mould growth when moisture is present.
Clean shower walls, bathtub edges, sinks, and tile surfaces regularly with appropriate bathroom cleaning products. Follow label directions, rinse surfaces when required, and allow them to dry. Wash towels, shower curtains, and bath mats according to their care instructions.
Avoid mixing cleaning chemicals, particularly bleach with ammonia or acidic cleaners, because dangerous gases can form. Never assume that household cleaning products can resolve mould growing behind walls or within damaged building materials.
For extensive or recurring mould, seek professional advice rather than relying on repeated surface cleaning.
Early detection helps homeowners respond before a small issue becomes widespread.
Common warning signs include:
Black, green, or brown spots on grout, ceilings, or caulking.
A persistent musty odour.
Peeling paint or bubbling finishes.
Damp patches or unexplained discoloration.
Repeated condensation or surfaces that remain wet for long periods.
Mould colour alone cannot reliably identify the species or determine its risk. If visible growth returns after remediation, investigate the moisture source instead of simply covering or repainting the affected area.
Professional assistance may be appropriate when mould covers a large area, returns repeatedly, is associated with a sewage or contaminated-water incident, or appears to extend into concealed building materials.
A qualified remediation professional can assess the affected area, identify moisture problems, recommend appropriate containment and removal procedures, and determine whether damaged materials need replacement. Plumbing or building specialists may also be required to correct leaks or ventilation deficiencies.
People with asthma, allergies, weakened immune systems, or other health concerns may need additional precautions around mould-affected spaces.
Following remediation, ask for documentation of the work completed, any remaining moisture concerns, and recommendations for ongoing prevention.
Yes. Mould can return if excess moisture remains, leaks are not repaired, ventilation is inadequate, or contaminated materials were not properly addressed. Long-term prevention depends on controlling moisture and correcting the original cause.
Continue running it after showering according to the manufacturer's recommendations and until excess moisture has cleared. A common practical guideline is around 20 minutes, although the required time depends on fan performance, bathroom size, and humidity.
No. Mould-resistant paint can help protect suitable surfaces, but it cannot compensate for leaks, poor ventilation, or persistent dampness. Proper moisture control remains essential.
Recurring mould may result from persistent moisture, soap residue, deteriorated sealant, or water trapped behind the joint. If growth repeatedly returns, investigate the underlying condition before replacing the caulking.
Contact a qualified professional if mould is extensive, keeps returning after cleaning, is associated with hidden water damage, or follows a sewage or contaminated-water event. Professional assessment can help identify the source and determine the appropriate response.
50+ Restoration, Environmental, Inspection & Property Maintenance Services – 24/7 Across Southern Ontario